Goods Receiving
Once the goods arrived based on the Purchase Order that are being issued out, the user shall then perform “Goods Receiving” as Stock-In the inventories into warehouse locations.
There are two methods to migrate data (common fields) from Purchase Order module to Goods Receiving module:-
i) Manual
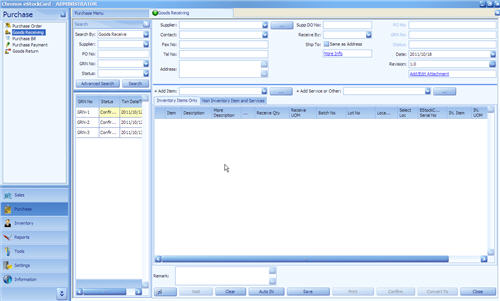
First click on “Goods Receiving” and then screen will appear (Fig. 1)
( Fig 1 )
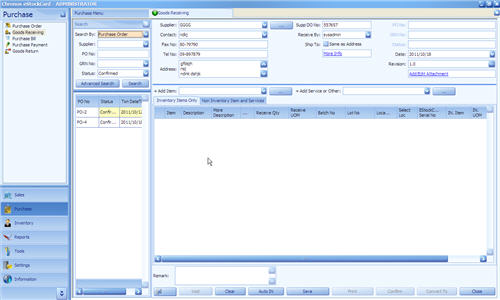
Step 1 Click the “Search By” pull-down and select “Purchase Order”( Fig. 2)
( Fig 2 )
Step 2 Please note that only “Confirm” Purchase Orders will be listed. (The status of Purchase Order must be confirmed). If the Purchase Order nos are not listed out, that mean they are yet to be confirmed.
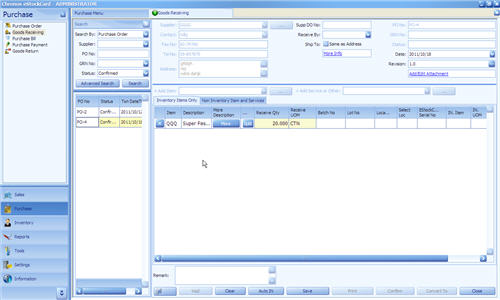
Step 3 Click the targeted Purchase Order for processing (Fig. 3)
( Fig 3 )
ii ) Auto Conversion from Purchase Order
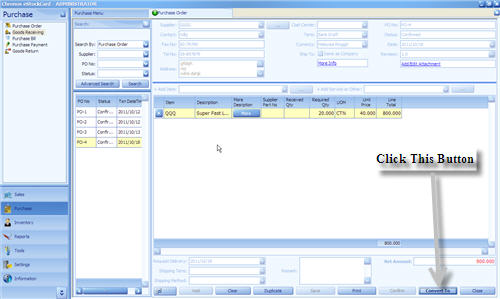
Step 1 Open the Purchase Order screen, and select the targeted Purchase Order. (Fig. 4)
( Fig 4 )
Step 2 Click “Convert To” button and “Goods Receive” button will appear. Click “Goods Receive”. System will automatically invoke “Goods Receive” module and auto fill some of the common fields. This will greatly reduce the additional step by going into Goods Receiving screen and then search for the Purchase Order nos. (Fig. 5)
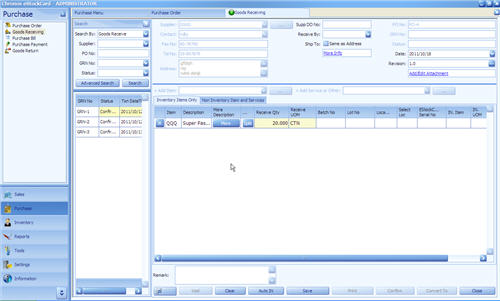
( Fig 5 )
Once the inventory details have been selected into the Goods Receiving screen, the steps below are required to expediting Goods Receiving processes:-
1 ) Enter data to “Supp DO No” (Supplier Delivery Number) for reference purpose.
2) Click “Receive By”, whom is responsible for this receiving task. Next, you will be directed to continue with put away steps, you can either do it manually or automatically where suggest by the eStockCard system:-
2.1) Auto Put Away
Click “Auto IN”, system will check and suggest the appropriate storage location for put away. If the proposed location ID is acceptable, then click “Save”.
2.2) Manual Put Away
Click “Select Loc”. (Fig. 6)

( Fig 6 )
You can manually select your preferred location ID, which will be shown (Fig 7 )
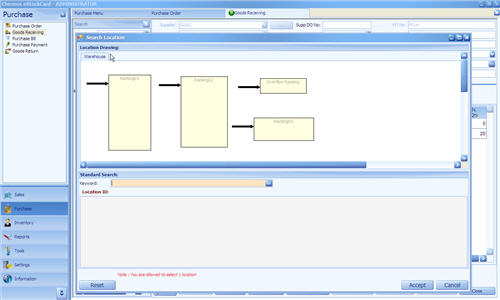
( Fig 7 )
Click “Save”
3 ) When “Save” button was clicked, system will reserve the location ID for this transaction and you will be assigned with a unique GRN number and the status of the GRN will be changed to “Active”. You still can amend the GRN, for instances, re-assign another location ID as long as the status of the GRN is “Active”.
4 ) If everything goes fine and please proceed to click “Confirm”, the status of the GRN will change to “Confirm” and the inventory will be stored and updated into the Inventory reports. No reversible can be done in later stage if the status is set to “Confirmed”.