There are about 10 reserve columns available in the eStockCard inventory system which can be renamed and then “Drag and Drop” them into the “IN” screen so that the info’s can be entered easily.
Method:
Lets rename one of the reserve columns as “Test” in the eStockCard warehouse system.
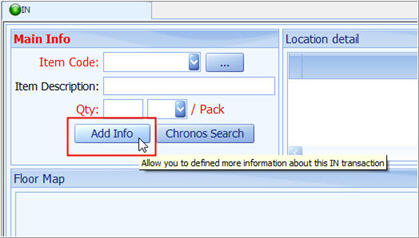
- Open “IN” screen, click the “Add Info” button.
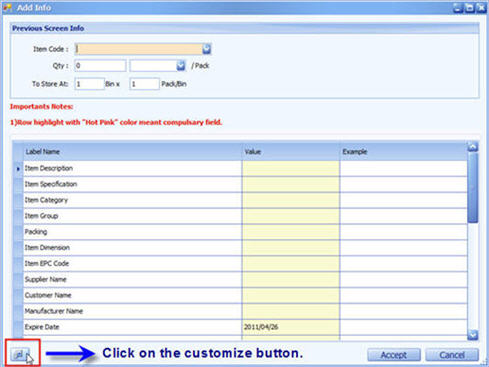
- Click the “Show Customization Layout” button on LHS (corner). It will bring up “Setup Additional Field” screen.
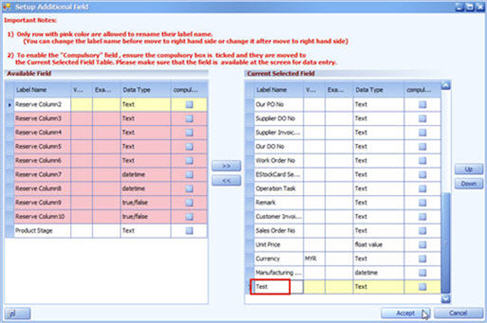
- On “Setup Additional Field”, on the left hand side, there are many reserve fields. Take the first one (Reserve Column1) and move it to the right hand side and rename it as “Test”. Click the “Accept” button and close the screen. Close the “Add info” screen and back to “IN” Screen.
- Then click “Show Customization Layout” button and choose “add new” menu.
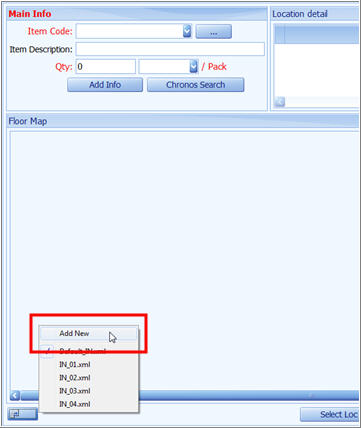
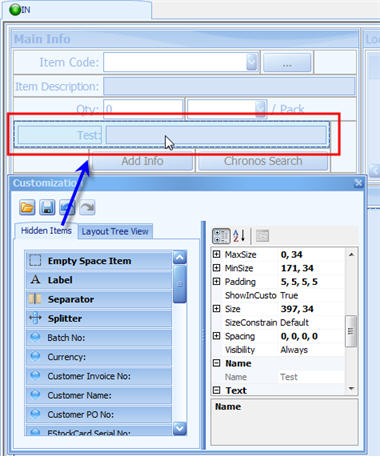
- The Customization dialog will show and you can look for the “Test” column that you have created under the Hidden Items tab. Drag and drop the “ Test ” and place at IN screen (anywhere you like).
Related posts:
- Can I print out documents from the IN & OUT screen for the eStockCard v3 Inventory System?
- How to use the Operation Task at IN and OUT screen for the eStockCard Warehouse System?
- Steps to link the Multiple eStockCard Inventory System PCs from different countries to share the same Database
- Multiple receiving at IN screen for eStockCard v3 Warehouse System
- eStockCard Inventory System on Design a Print Out Label