IN
Once goods were received, it has to be entered into the system. This process will be handled by IN Operation.
Component Requirement
Prior to the launching of IN operation, the following settings must be configured.
- Settings > Location {Where to store}
- Settings > User Manager {who performs this operation}
- Settings > Item Master {What to store}
However, you can create new item on-the-fly during IN operation if you enable this feature. Path: Settings > System > Operation Setting and tick “Auto Update Option”
Using the setting as below:
- User - We have created a new user called “A” [password: Z] and only able to perform operation which can be verified through the path: Settings > User Manager
- Location – There are 2 storage racks. Each rack has 5 layers. Each layer has 10 bins. There is an overflow storage area. Total locations: 101 . Which can be verified through the path: Settings > Location.
- Item – A new item, item code “MS Windows Vista Business” You can verify them through the path: Settings > Item > Master
Application
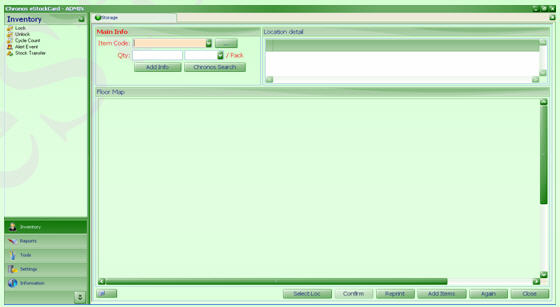
Path: Inventory > IN, you will see this, (Fig. 1)
( Fig 1 )
The layout of IN screen is so simple! This is the default (preset) layout. If you feel the layout of this screen is NOT suitable or NOT fit to your current operation. You can change it according to your preference or process by customization the IN screen.
Example
Assume that we have received 20 copies of “MS Windows Vista Business” from local main distributor. Every 10 copies are packed into a packing box. Hence, there are total 2 packing boxes for 20 copies. Here are the steps to perform an IN operation:
Step 1 Clicks “Inventory > IN”.
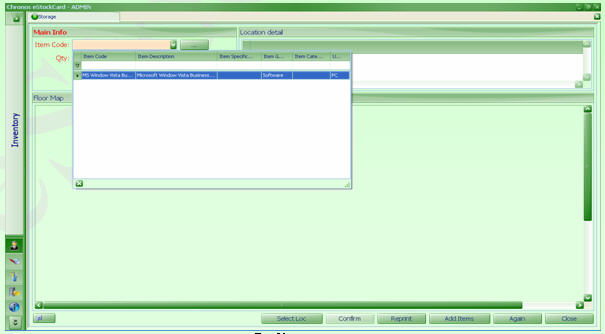
Step 2 Select “MS Windows Vista Business” from item code drop down (Fig.2)
( Fig 2 )
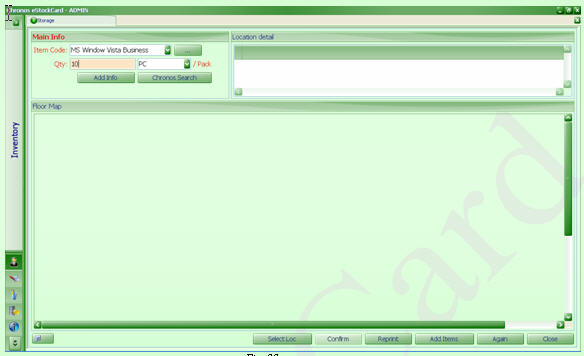
Step 3 Enter QTY = 10, each carton (or each pack) consists of 10 copies. (Fig. 3)
(Fig 3 )
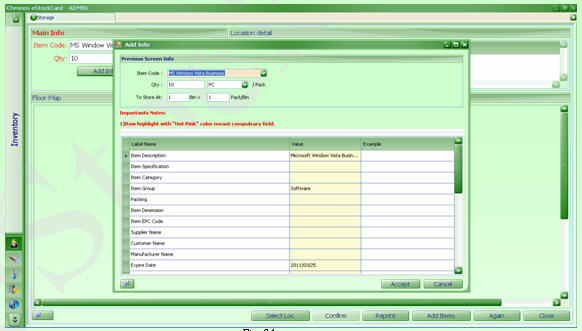
Step 4 Clicks “Add Info” (Fig. 4)
( Fig 4 )
There are two approaches to store 2 packing boxes.
Option 1 – Store them in the same location, Enter Bin = 1, Pack/Bin = 2
Option 2 – Store them in separate locations, Enter Bin = 2, Pack/Bin = 1
Now, assume that we choose option 2. That means we require 2 different locations for each packing box. Please enter Bin = 2, Pack/Bin = 1 (Fig. 5)
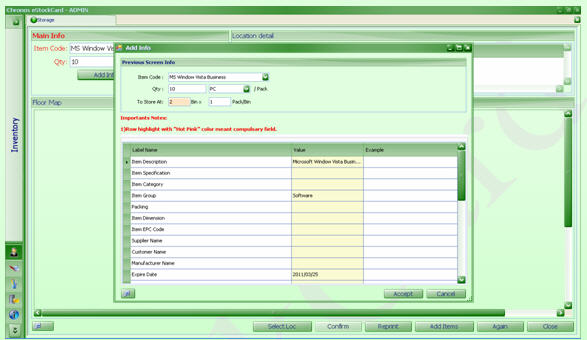
( Fig 5 )
Clicks “Accept”. It will return to original IN main screen.
Step 5 Clicks “Chronos Search”. Search engine will find 2 appropriate locations (Fig. 6)
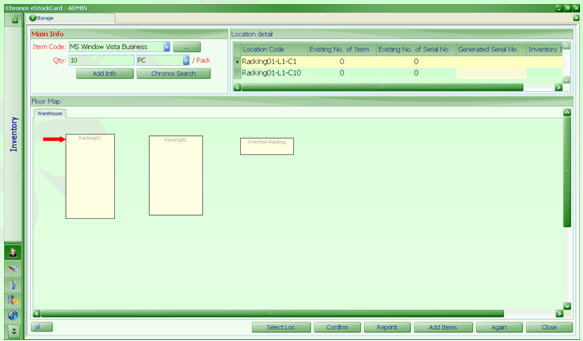
( Fig 6 )
Step 6 If the suggested locations are acceptable, clicks “Confirm”. Otherwise, you can change it manually by Clicks “Select Loc”. After “Confirm” button is pressed. (Fig. 7)
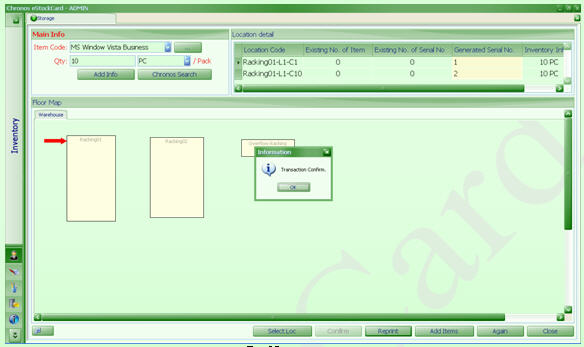
( Fig 7 )
First packing box will be stored at “Racking01-L1-C1”, serial number = 1 has been generated.
Second packing box will be stored at “Racking01-L1-C10”, serial number = 2 have been generated.
Important Note
A tag will be printed once this operation is done successfully. The tag consist much useful information such as item code, qty, serial number and location code. You are advised to paste it on the physical item for trace-ability and validation.
If you wish to add or delete information on the tag, you amend or modify it by re-design the label and activate it. {Path: Tools > Label}.
To enable the auto-print tag feature, you have to enable it by ticking on the Auto print tag after confirm at “IN Setting”.
Path: “Settings > System> Operation Setting under the IN and OUT tab (Fig. 8 )
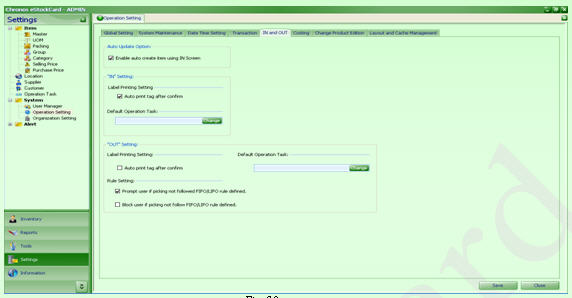
( Fig. 8 )
Step 7 Click “Again” to perform new IN operation or Click “Close” to exit IN screen.
Validation
Path: Reports > Inventory, you will see this (Fig. 9)
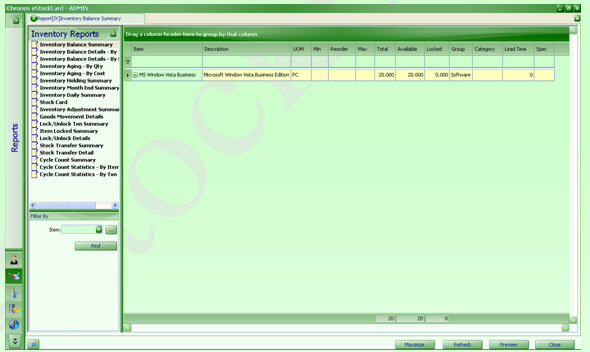
( Fig. 9 )
There are many form of reports are available to validate the IN operation performed.
Option 1 Reports > Inventory > Inventory Details – By Item
Step 1 Click “Reports > Inventory > Inventory Details – By Item” (Fig. 10)
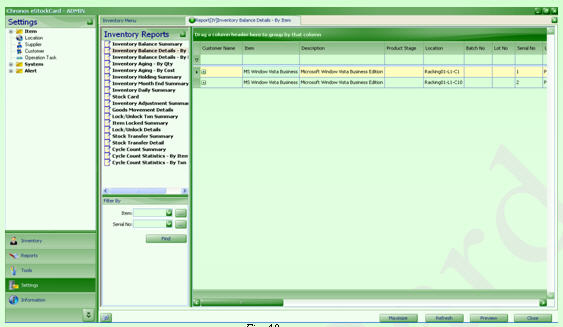
( Fig 10 )
Step 2 To filter the item code, under “Filter By” pull down, select “respective item code from item code drop down and click “Find”.
Option 2 Reports > Inventory > Inventory Details – By Location
Step 1 Click “Reports > Inventory > Inventory Details – By Location” (Fig. 11)
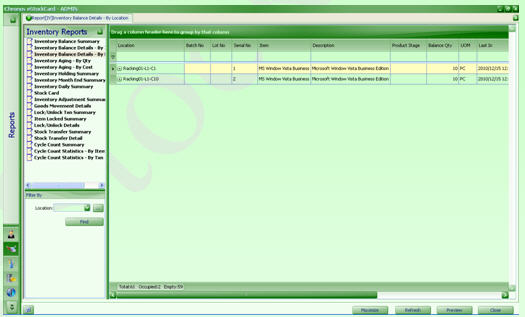
( Fig 11)
Step 2 You can filter by specific location; otherwise, all locations (NOT EMPTY) will be displayed.
Option 3 Reports > Inventory > Goods Movement Details
Step 1 Click “Reports > Inventory > Goods Movement Details” (Fig. 12)
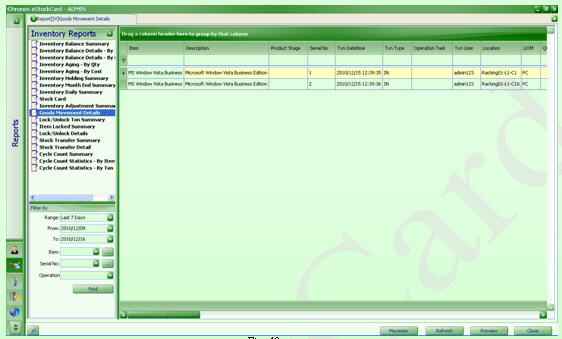
(Fig 12 )
Step 2 There are many filtering criteria available to help you to obtain more specific information. We will discuss this in great details later.
Until this stage, you should be able and familiar to perform an IN operation and validate what has been done.
However, this is only basic operation. There are many optional fields available for you to enter appropriate data.